View Control Bar
The View Control bar is at the bottom of every view and is contextual based on the type of view
that you’re working in . Some views (like sheet views) won’t have them. Perspective
views won’t show a scale.
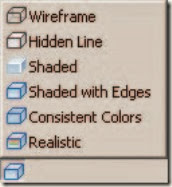
From left to right you have Scale, Detail Level, Visual Style, Sun Path (on/off), Shadows
(on/off), Rendering Show/Hide (only in 3D views), Crop (on/off), Show Crop (show/hide),
Temporary Hide/Isolate, and Reveal Hidden Elements.
One of the nice features in Revit Architecture 2011 is the ability to see realistic colors from the
visual style.
The difference is subtle, but when combined with other graphic features, it will likely lead to
users not rendering project views that are part of the document set. Rather, they’ll opt for having
real-time views.
View Cube
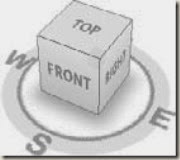
You’ll find the View Cube in 3D views.
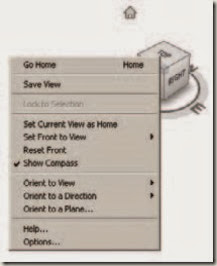
Hovering over the View Cube will reveal the Home option (the little “house” above the
View Cube), which will bring you back to your home view. Right-clicking the View Cube will
open a menu that allows you to set, recall, and orient your view.
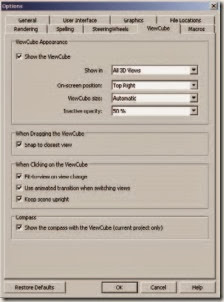
Selecting the Options menu will take you directly to the View Cube options in the Options
Bar.
Navigation Bar
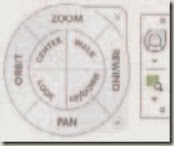
The Navigation bar contains the Navigation Wheel, View Zoom, and Pan controls.
Ribbon
The Ribbon contains all of the Revit functionality for designing and documenting your Revit
project . There are specific portions of the Ribbon that you should be familiar.
Tabs
Tabs are used to select from among the various groups of functionality in Revit. There are nine
tabs in the Revit Ribbon.
We’ll take a moment to briefly describe these tabs.
Home The Home tab is used to create or place content (both system and component families)
as well as datum
Insert The Insert tab is used to link external files (2D, 3D, image, and Revit file types) as
well as search for external content via Autodesk Seek.
Annotate The Annotate tab contains many of the tools necessary to annotate, tag, dimension,
or otherwise graphically document your project.
Structure The Structure tab contains the tools necessary to add elements, which can be
structurally analysed in Revit Structure. You can also add datum from this tab.
Massing & Site The Massing & Site tab contains the tools necessary to add massing- and
site-related elements.
Other than infrequency of use, Massing and Site elements are so conceptually dissimilar that
we believe they should occupy separate tabs.
Collaborate The Collaborate tab refers to the tools that you’ll use to coordinate and manage
the project within your own team as well as across other teams and their linked files.
View The View tab refers to the tools that you’ll use to create all your project views, 2D and
3D, as well as schedules, legends, and sheets. You can also modify your user interface from
this tab, including your keyboard shortcuts.
Manage The Manage tab contains all your project standards and other settings. This tab also contains your design option and phase tools. We believe it would
make more conceptual sense to locate design option and phase tools in the Home tab.
One of the most important settings that you’ll use during your project is Object Styles on the
Manage tab. Selecting this option will allow you to manage the global visibility settings for
just about everything in your project: how it projects, how it cuts, and its associated color and
pen weight.
Modify The Modify tab contains the tools you’ll use to manipulate all the content that
you’re creating in your Revit project
Contextual Modify Contextual Modify tabs are contextually revealed as part of an addition
to the Modify tab when specific elements are selected. Contextual tabs are
located to the far right of all the other panels in your Ribbon.
Panels
Panels identify areas of grouped functionality in the Ribbon. They can also be pulled out of tabs
and arranged so that functionality is persistently exposed. To relocate a panel, simply click and
drag the panel portion out of the Ribbon.
The panels will snap together if you hover over a previously placed panel. To return a panel
to the Ribbon, simply click the small down arrow that is in the upper portion of the right grey
bar in the panel set.
Options Bar
The Options Bar is a contextually sensitive area that gives you feedback as you create and modify
content
